Create interactive menus for displaying your content separately and only resulting from an action performed by the viewer. Divide long texts into smaller chunks and let your audience explore the content as they want, when they want, and in the order they prefer.
*Supported on screenpublishing App for Android 4.2.0+ and Windows App 9.1.1+
For this tutorial, we will build the following campaign:
Download the prepared zip folder with the files and try to recreate the same campaign yourself.
- Note: When creating your own campaign, make a paper sketch before even loading the screenpublishing website. Plan in advance:
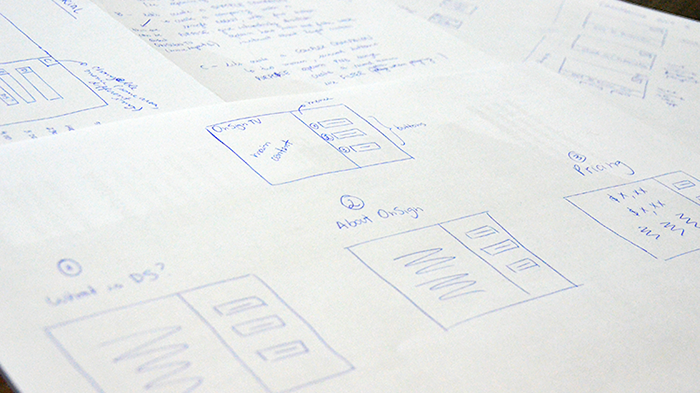
- How your content will be divided. Define your campaign’s goal and split your content into different sections accordingly. Attempt making different navigation maps and decide which one you think would work better.
- How many buttons you will need. Each page requires a button or another action that will trigger the content on screen. Think about their design, where they will be placed on screen and if it is clear it can be clicked!
- How your campaign layout will look like. Give unity to your campaign, even though there may be several different pages. Use colors, fonts and layouts to unify different pages. Read more about design in this screenpublishing blog post.
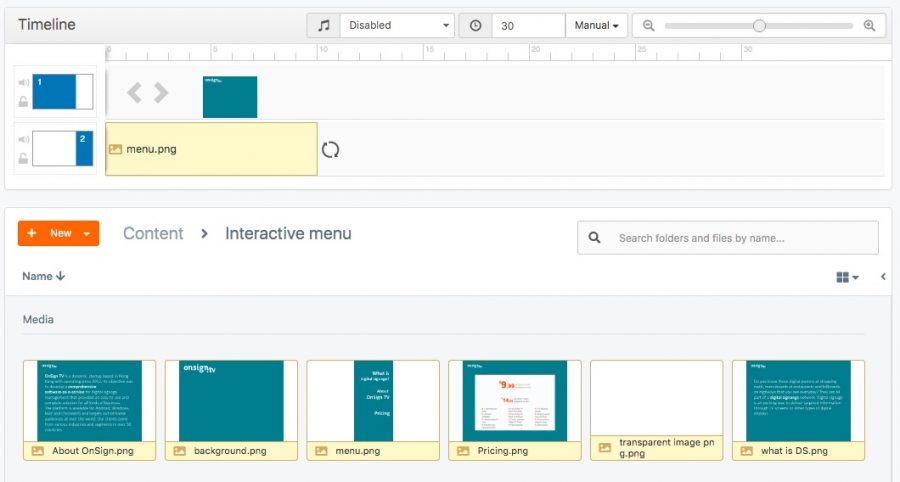
- When you are ready with your campaign sketch, prepare your content. You are not able to trigger apps on screen. So, if you plan on setting text as hidden content, create it in a software on your computer. Then, save it in an image format – such as JPEG and PNG – or PDF. Design and insert media on every individual page.Create an image containing all menu buttons (see image below). For this campaign, we also created a standard background which will appear when no action is triggered.
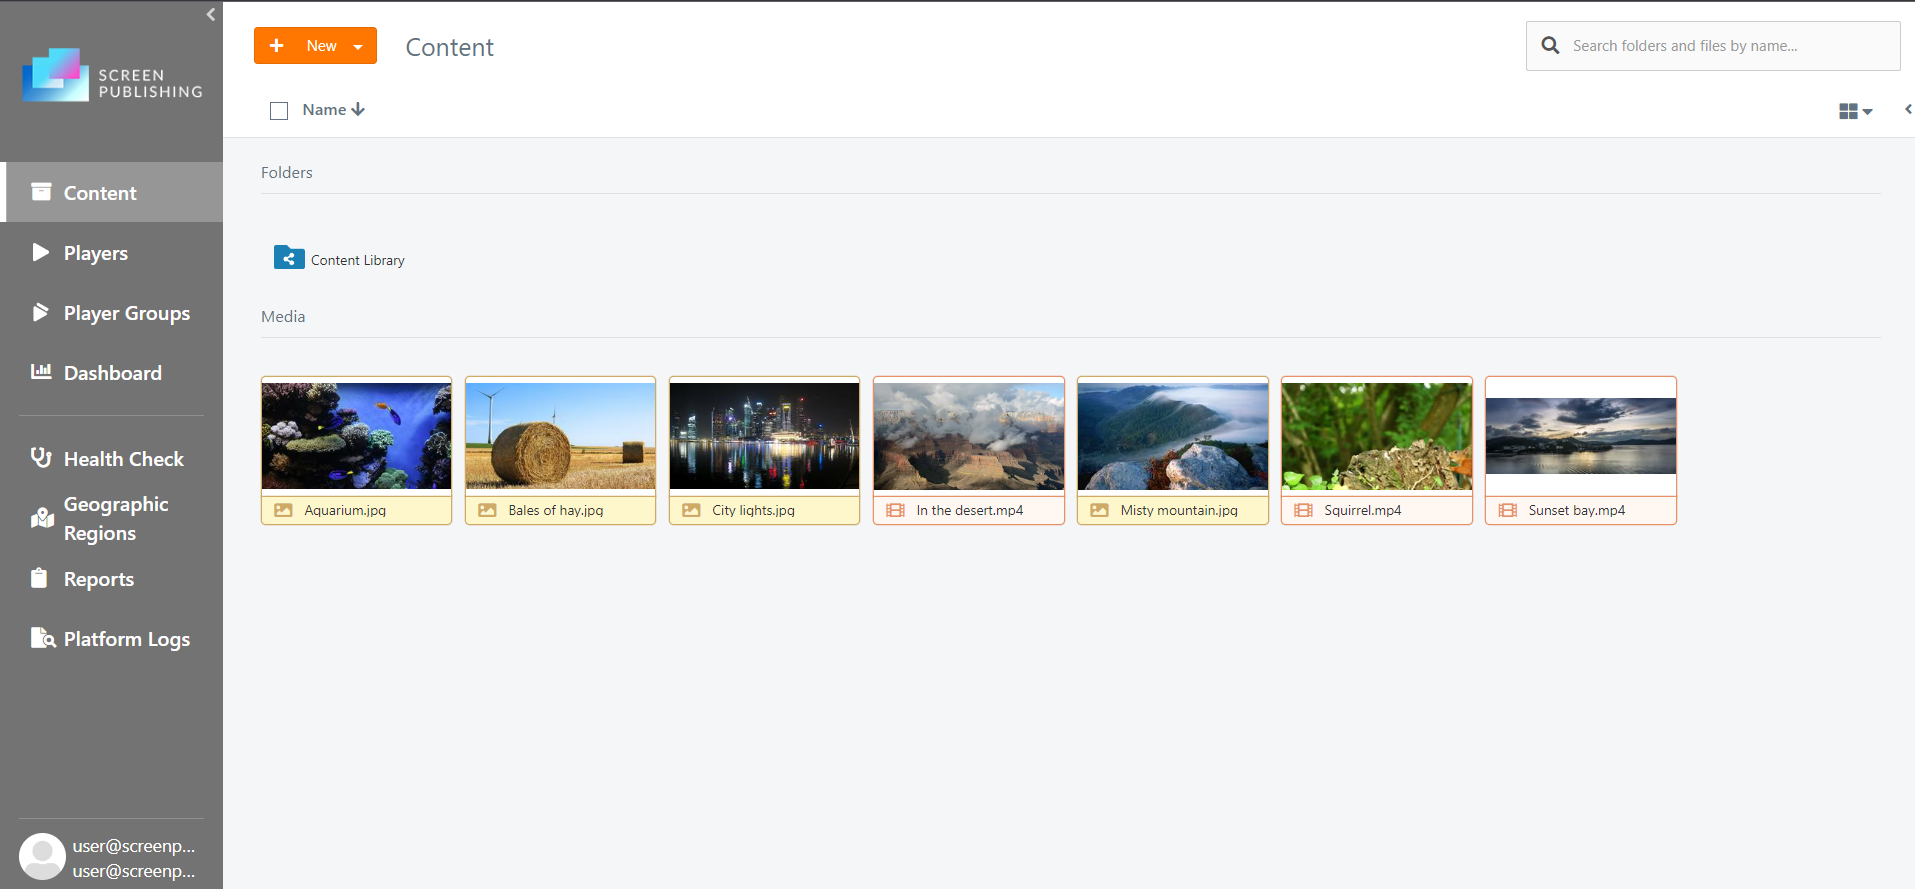
- Upload all files to your screenpublishing Account.
- Create a new Campaign. Create the custom layout you have planned. For this tutorial, we planned two zones: main content area (A) and menu (B).

- Place the files on the Timeline.
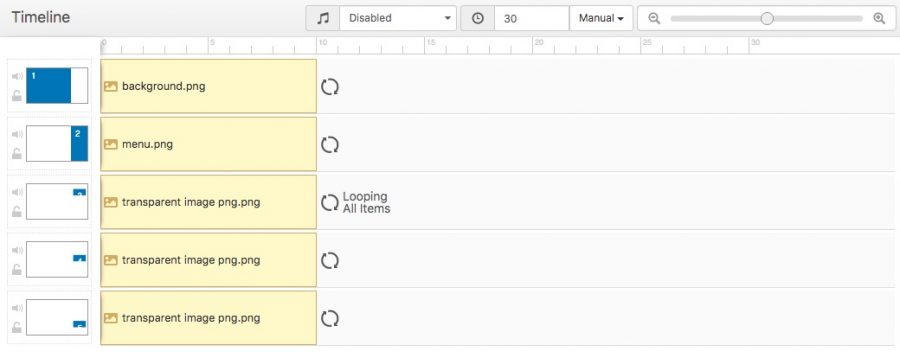
- Now, edit your current layout and create screen divisions where the buttons on the menu area will be.

- Add a completely transparent image to these new areas on your Timeline to save the campaign (screenpublishing doesn’t allow you to save a campaign with empty timeline rulers) and the button’s text will appear beneath the transparent image.The image must be in the PNG format (learn more about transparency).
- “Save and Publish” the content when you are done.
- Click on “Interactivity” from the sidebar menu of the newly loaded page.
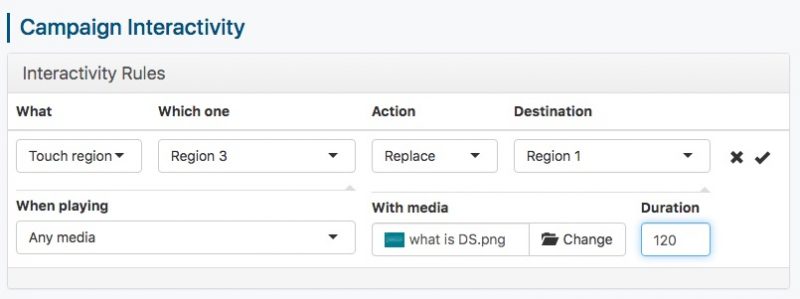
- Click on “Add Interaction” on the header for adding an action to each button.

This is the moment we give life to your Campaign! Let’s start with Region 3 (titled “What is digital signage?”) and turn it into a clickable area. Every time the user clicks on it, the content in Region 1 will be replaced by the “What is digital signage” PNG file:
Adjust the settings for the remaining areas:
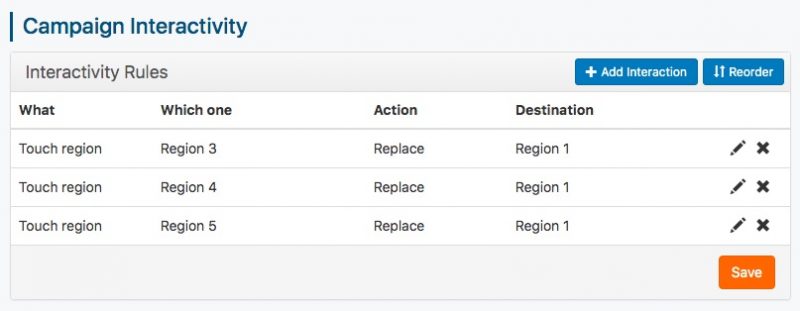
- Hit “Save changes”.
- Publish the Campaign to a Player and check out the result!