*Supported on screenpublishing App for Android 4.2.0+ and Windows App 9.1.1+
You can create at most ten different screen zones in a campaign layout. Anything else would look too cluttered. Hence, you are not able to create a single menu with more than ten buttons at a time. You will need to create a second menu by changing the background zone image. See an example below:
Learn how to create two menus by reading the instructions below. We have used an screenpublishing interactive campaign taught in the previous interactive tutorial. We recommend you do this first. If you have already, download the image files used in this tutorial campaign and follow the instructions below to create a second menu.
next icon at the bottom (see image below). Replace it in the menu area of your Timeline.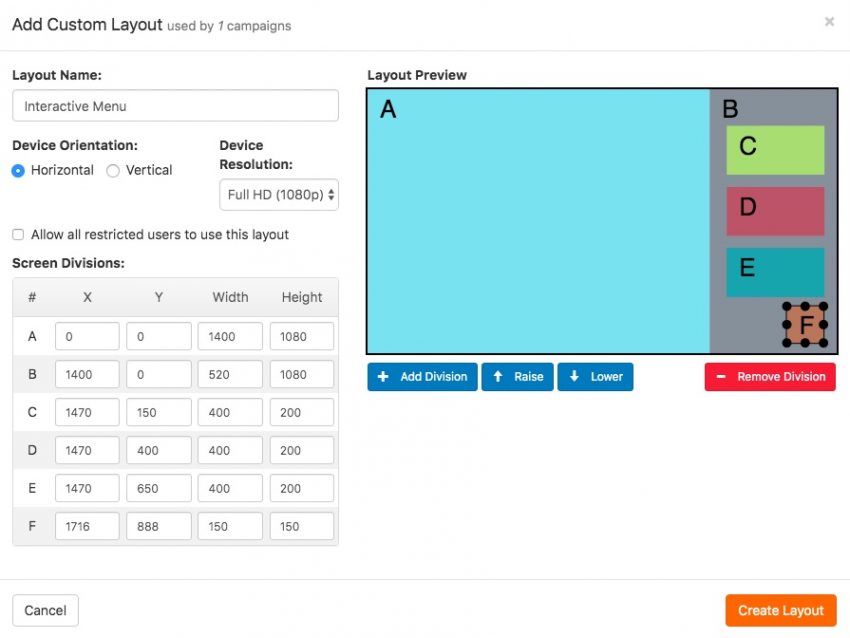
back icon on the bottom (see example below). For now, only upload this image to your screenpublishing platform – do not place it in the timeline.

The “next” button will now lead to the second menu. Next, we need to add filters to all actions that are already set for the menu 1 buttons. Set “menu 1” for the “When playing” field. This will avoid that content from menu 2 is shown when we click a button from menu 1.
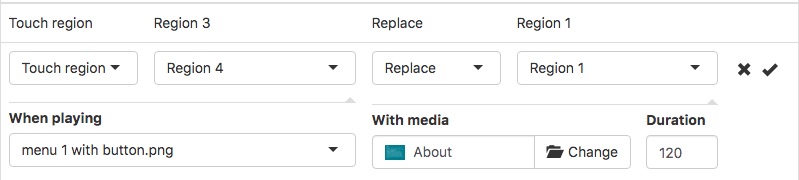
Now, we need to configure all actions of the second menu. Instead of choosing “menu 1” for “When playing”, we have to select “menu 2”. Set the file you want to trigger for “with media”.

At last, configure the “back” button on the bottom for changing the menu back again.

Tip: If you replace media items on a screen zone, set long display durations if you want the user to navigate freely through the content. If you keep a shorter time duration, it might happen that the user is interrupted while reading the text.